
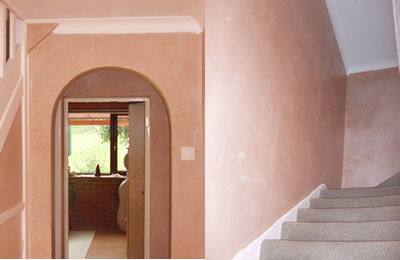
If the walls of your house need a makeover, you can never go wrong with plaster. Plaster not only adds to the aesthetics of your house but also your comfort level living in the house – plaster is fire- and sound-resistant in addition to being easily made to look like other surfaces.
The three-coat treatment
When you choose a plaster finish, the plaster must adhere to the support surface and should bear its own weight without cracking. To make a good quality plaster finish, the lath on which it is applied must be in perfect condition. Wood lath used to be the standard base for plaster but the ability of wood to expand and contract when it absorbs water can make it to produce cracks on plaster.
Metal lath is now more popular because it doesn’t change size as much as wood and it also has more keys (spaces in between) for plaster to adhere to.
The three-coat plaster treatment starts with two coarse layers. These form the base of the plaster. They are made by mixing gypsum or lime, fiber, aggregate, and water. Sand is the most common aggregate for rough-coat plaster. Lime is from ground oyster shells or limestone. If you use gypsum, the addition of fiber is optional. The sand/gypsum mixture should have a 3:1 ratio for rough coats.
The first coat, also known as the scratch coat, should be applied to a thickness of 3/8 inches and combed to give it a rough surface. The second (brown) coat is applied on the first coat and should be of the same thickness as the first one. This coat should not be combed because the sand provides a surface that is rough enough for the thinner third coat to adhere to.
The art of mixing plaster
Mixing plaster is like doing chemistry and if you don’t have experience, you should hire a professional. The first step is to make a ‘gauge’ which is a circle of banked putty like a swimming pool. Pour water into the center of the putty and sprinkle lime and cement. The ratios should be as accurate as possible. Leave the mixture to react until it stops giving off heat.
Afterwards mix it with the putty. This mixture is the final layer of your plaster and will be responsible for the hard, shiny finish. To keep the plaster moist as you work on the finish, you should use a spray bottle with water.
Under the surface
No plastering job is exactly like another. The quality and durability of the finish depends on the surface on which the plaster is applied. You must assess the masonry, walls, ceilings, or any other surface that needs plastering in order to determine if it is suitable for a plaster coat. You can apply plaster directly on bricks if they are sturdy enough to support the plaster coat.
If a surface does not look like it can support plaster, you can add a mesh on the surface for additional support. Both these methods can be used if the entire surface is not evenly worn. The final decision is the plasterer’s to make.
Guest post supplied by Mark Stubbles, Mark loves a bit of DIY and writes for PlasterPro, a West Yorkshire based plastering firm.