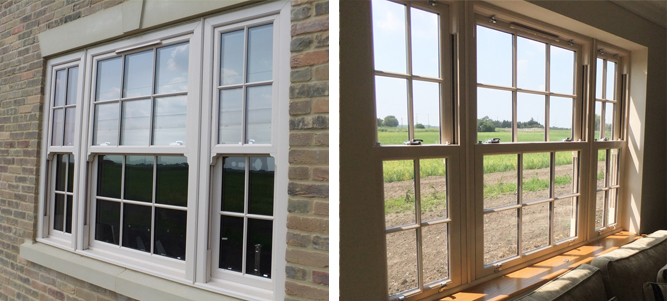
Over recent years, the popularity of box frame wooden sash windows here in the United Kingdom has quite literally exploded. As time goes on, more homeowners than ever before are looking to the designs and timeless styles of years gone by to inject a stunning new aesthetic dynamic into their properties. And of course, the fact that the very best sash windows on the market today are also superbly secure and energy-efficient serves as quite the bonus to say the least.
When it comes to essential maintenance, however, there are certain important differences between classic sash windows and most other contemporary window types. One of the most beautiful benefits of installing wooden sash windows is the way in which they have the potential to open up a world of possibilities with regard to colour choices and paint jobs. Indeed, the ability to change and touch-up the colours of your choosing at any time is appealing to say the least, though it’s hardly surprising that those approaching sash window painting for the first time find the prospect a little daunting.
With small glass panes and mullions all over the place, it does appear to be a taxing task. Nevertheless, with a few tips and essential insights from the experts, getting a pretty fantastic job done doesn’t necessarily need the professional intervention.
Here is a brief overview of just a few tips to help smooth things along:
One Step at a Time
First and foremost, never overlook the importance of focusing on one area of one window at a time, rather than trying to get everything done as quickly as possible. Whichever way you look at it and no matter how you approach it, this is absolutely not the kind of job you can rush unless you don’t mind making a complete hash of things. There’s plenty of precision involved, so the best way of going about things is to tackle one mullion at a time and to never move onto the next until you are genuinely 100% happy with the last.
Layering Up
One of the most important things to remember when it comes to painting sash windows is the way in which the sliding action of the units can be affected by the building of paint over time. Every time you change your windows, you add another layer to the surface of the unit which although extremely thin will add up over time. Suffice to say, the last thing you want is to find yourself in a situation where your windows end up either difficult to use or painted shut. Think carefully about the thickness of the paint and the sliding action in general, being sure to first remove any excessive or thick paint before going ahead with a new coat.
The Writings On the Wall
While all DIY enthusiasts may have their own preferred techniques and strategies, there is nonetheless one very specific rule to follow when it comes to painting sash windows. In a nutshell, if you are right-handed and tend to write in the standard Western manner, you should approach the paint job as if you were writing a document – as in starting at the top left-hand side and working down to the lower-right. This makes the whole job infinitely easier to approach from beginning to end – just try doing things the other way around for clarification of this!
Ignore the Little Flicks
Are you going to get through the job without splattering bits and pieces of paint all over the glass? Of course you aren’t – even the professionals can’t totally avoid little flicks here and there. But here’s the thing – actually trying to get that paint off the glass while it’s still in any way wet will usually do more harm than good. Instead, it’s a much better idea to give it plenty of time to dry and then get busy with a razor blade. Once dry, it’s infinitely easier to scrape off without damaging the glass or spreading it around even further.
If Unsure, Call the Pros
Last but not least, it’s a good idea not to underestimate just how involved and intensive the job as a whole can be – especially if you are looking at tackling a pretty sizeable contingency of sash windows of various shapes and sizes. You’ll need a fair few quality tools to get the job done, so it’s technically worth at least considering consulting the professionals to see how much it would cost you to have the job done on your behalf. It costs nothing to find out and you never know, it could actually work out even cheaper than the DIY approach!